How to Sign Up for OnlyFans, Verify Your Account, and Set Up Your Profile: A Step-by-Step Guide
OnlyFans is a popular platform for monetizing adult content, but to start earning, you’ll need to create an account, verify it, and set up your profile properly. In this article, we’ll walk you through each step and show examples of successful creators’ pages.
We’ll also explain how models from Russia, Belarus, and other CIS countries, where registration is restricted, can still create an account. You’ll learn about the methods many agencies use to get accounts verified despite these limitations.
How to Create and Set Up an OnlyFans Account
Signing up for OnlyFans is similar to other platforms. All you need to do is enter your name, email address, and create a password, or you can sign in using third-party services like your Google or X account.

Use an international email service like Gmail or Outlook. After that, you need to verify your email address. To do this, go to your account settings, send the confirmation email, and then click the link you receive.

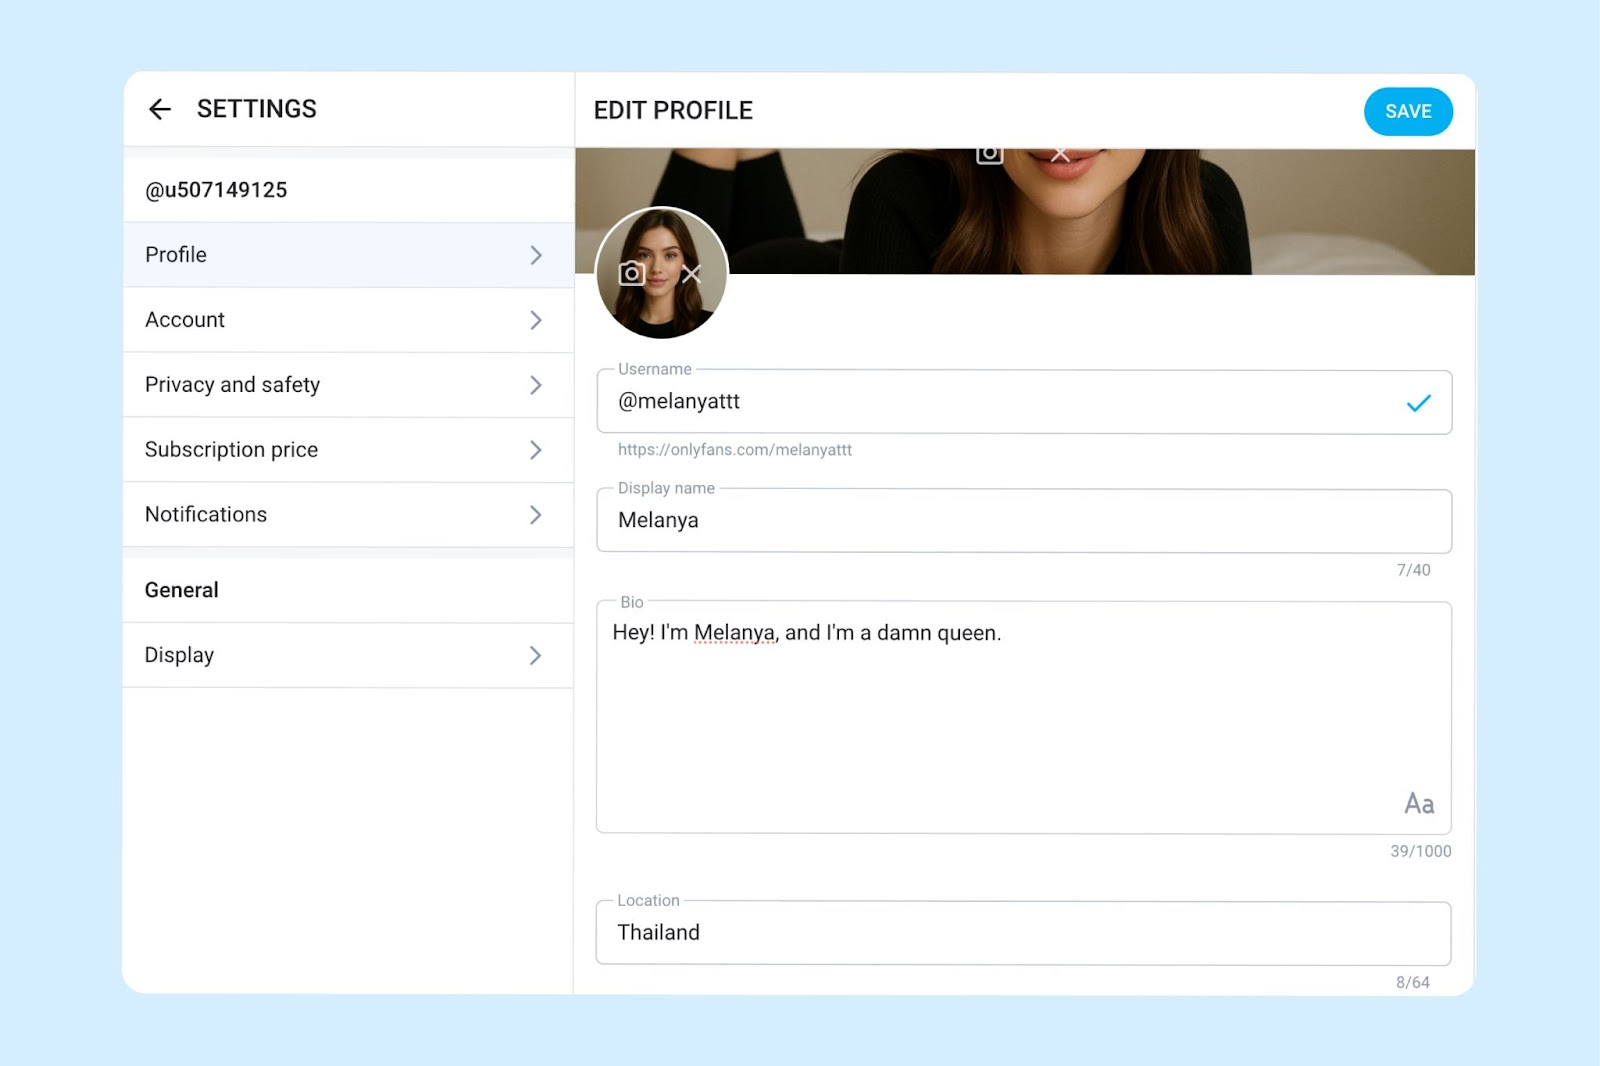
At this stage, you need to set up your profile for the first time by choosing a profile picture, banner, username on the platform, and a description. You can keep it simple and just include the essentials to save your changes and get your account ready.
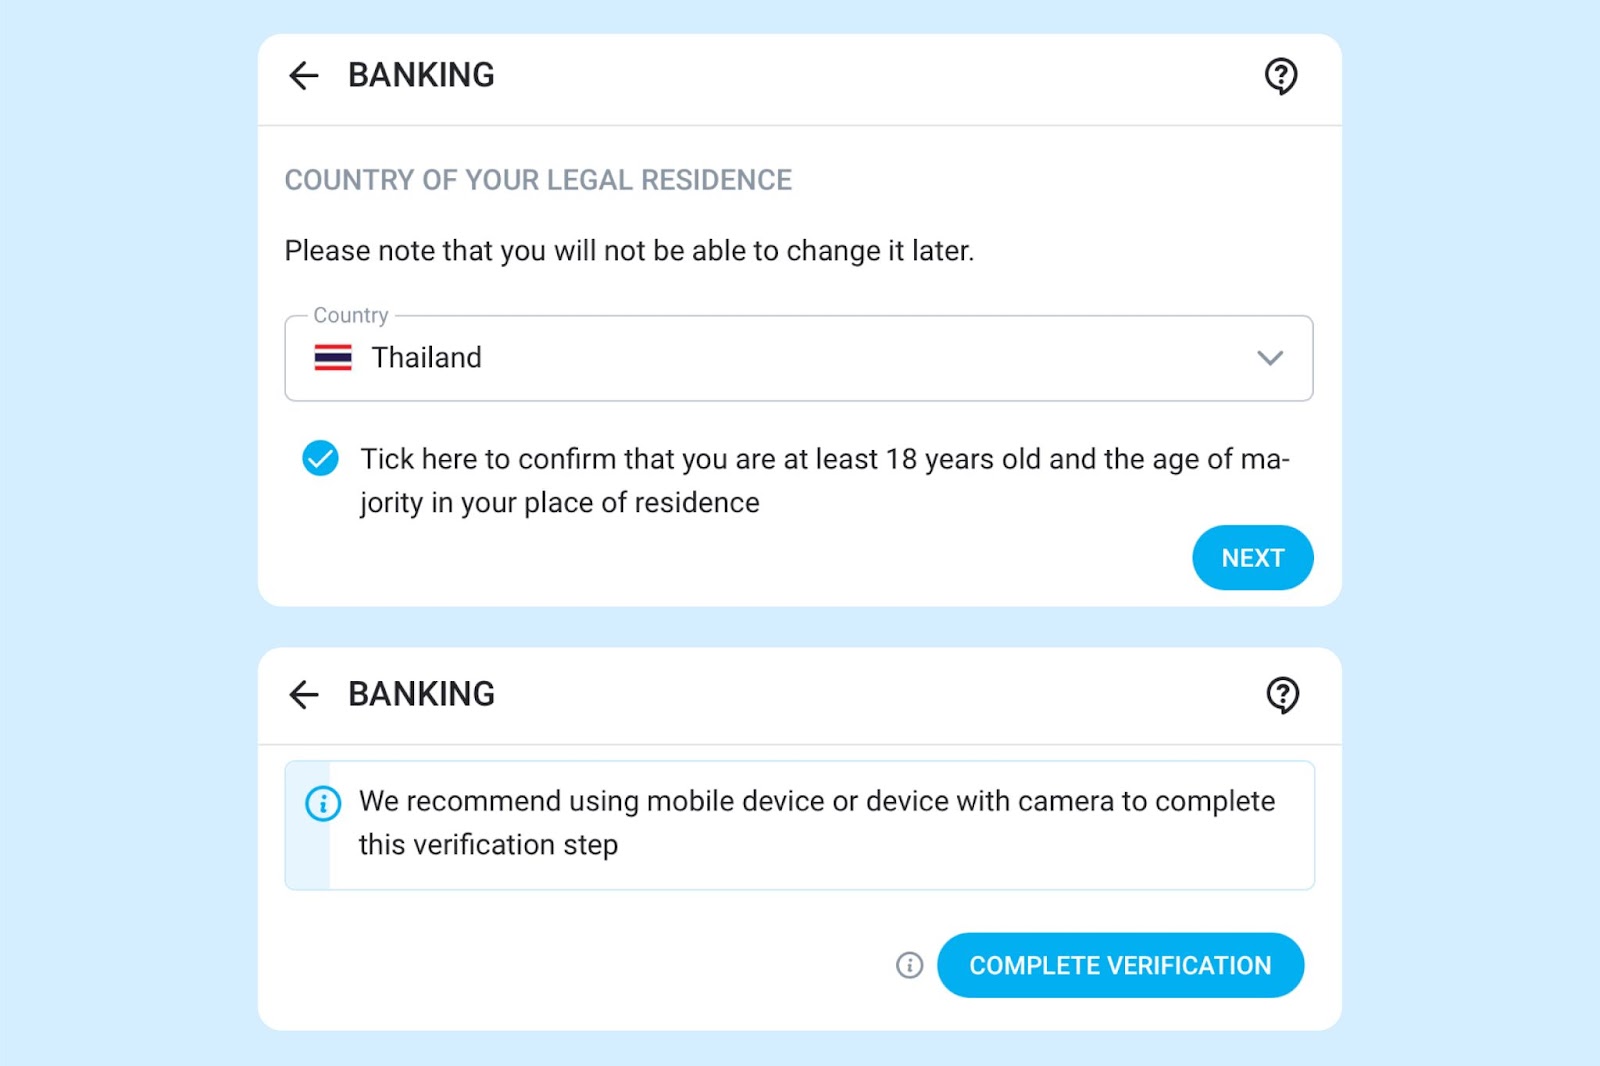
Next, click on the “More” section in the left sidebar, and then select “Become a Creator.” The system will ask you to choose your country of residence, since this determines whether you’ll be able to verify your account later.
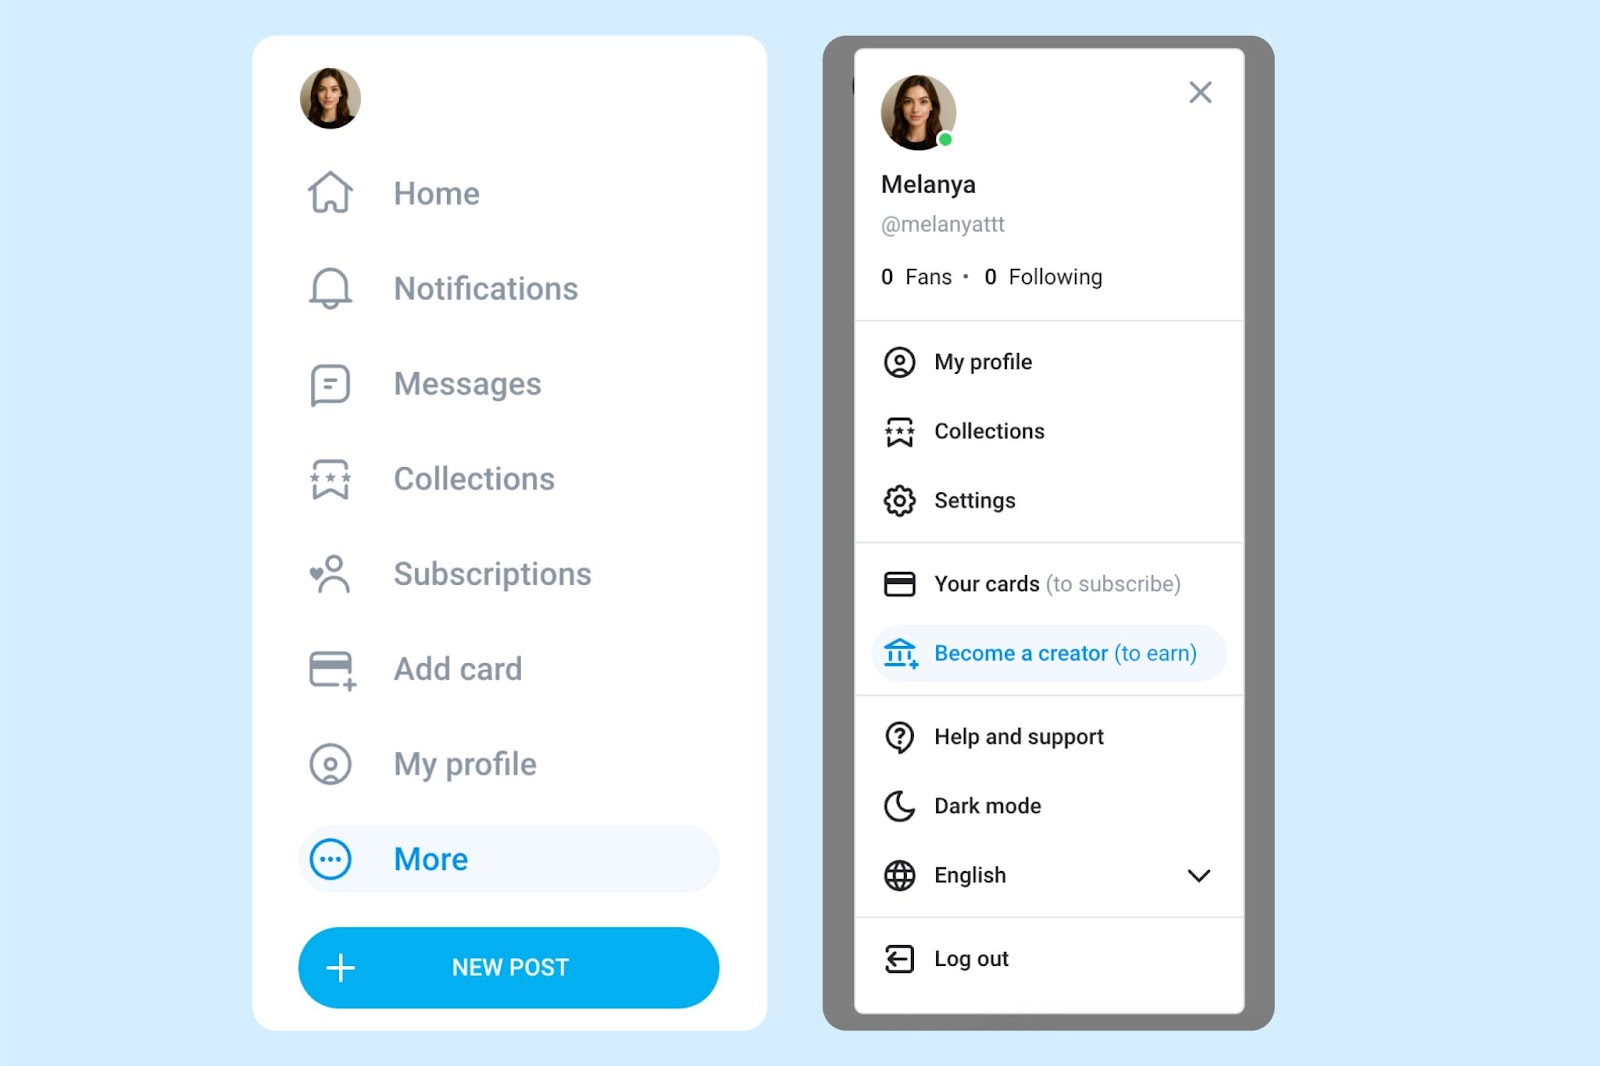
Then you need to select a country of residence whose documents will be accepted for account verification in the future. You may also be required to link your phone number for two-factor authentication.
Your account is now set up and ready. Let’s talk about how to complete the verification process correctly.
How to Verify Your OnlyFans Account: Preparing Your Profile and Documents
To start receiving payments on OnlyFans and get full access to creator tools, you need to verify your account. For this, you’ll need documents that prove your identity and your actual residence in the country, such as a passport, driver’s license, residence permit, or national ID.
Verification process
Once your documents and SIM card are ready, you can proceed to profile verification. It’s important to remember that a real person—a moderator—will review your application and check several factors. The most important thing is to show that you are a real person signing up on the platform willingly.
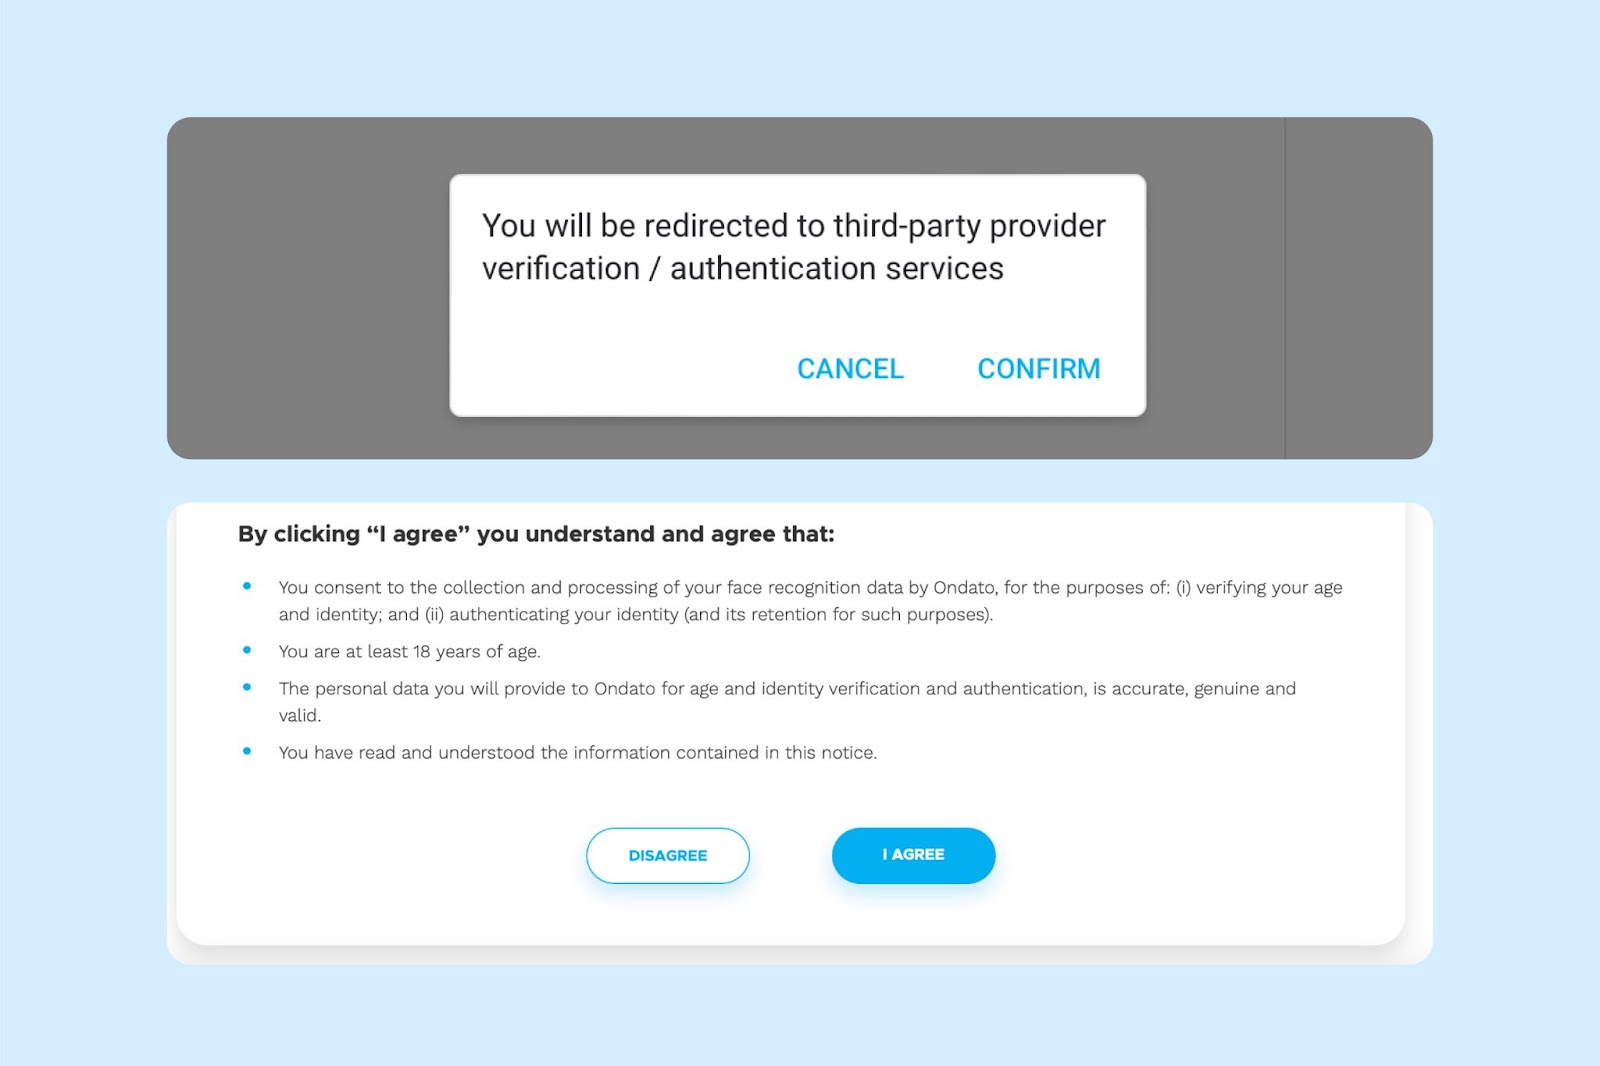
After you start the verification process, the system will redirect you to another page where you need to confirm the agreement. Then the actual process begins: you’ll need to choose the type of document you’ll use for verification, and then click “Start.”
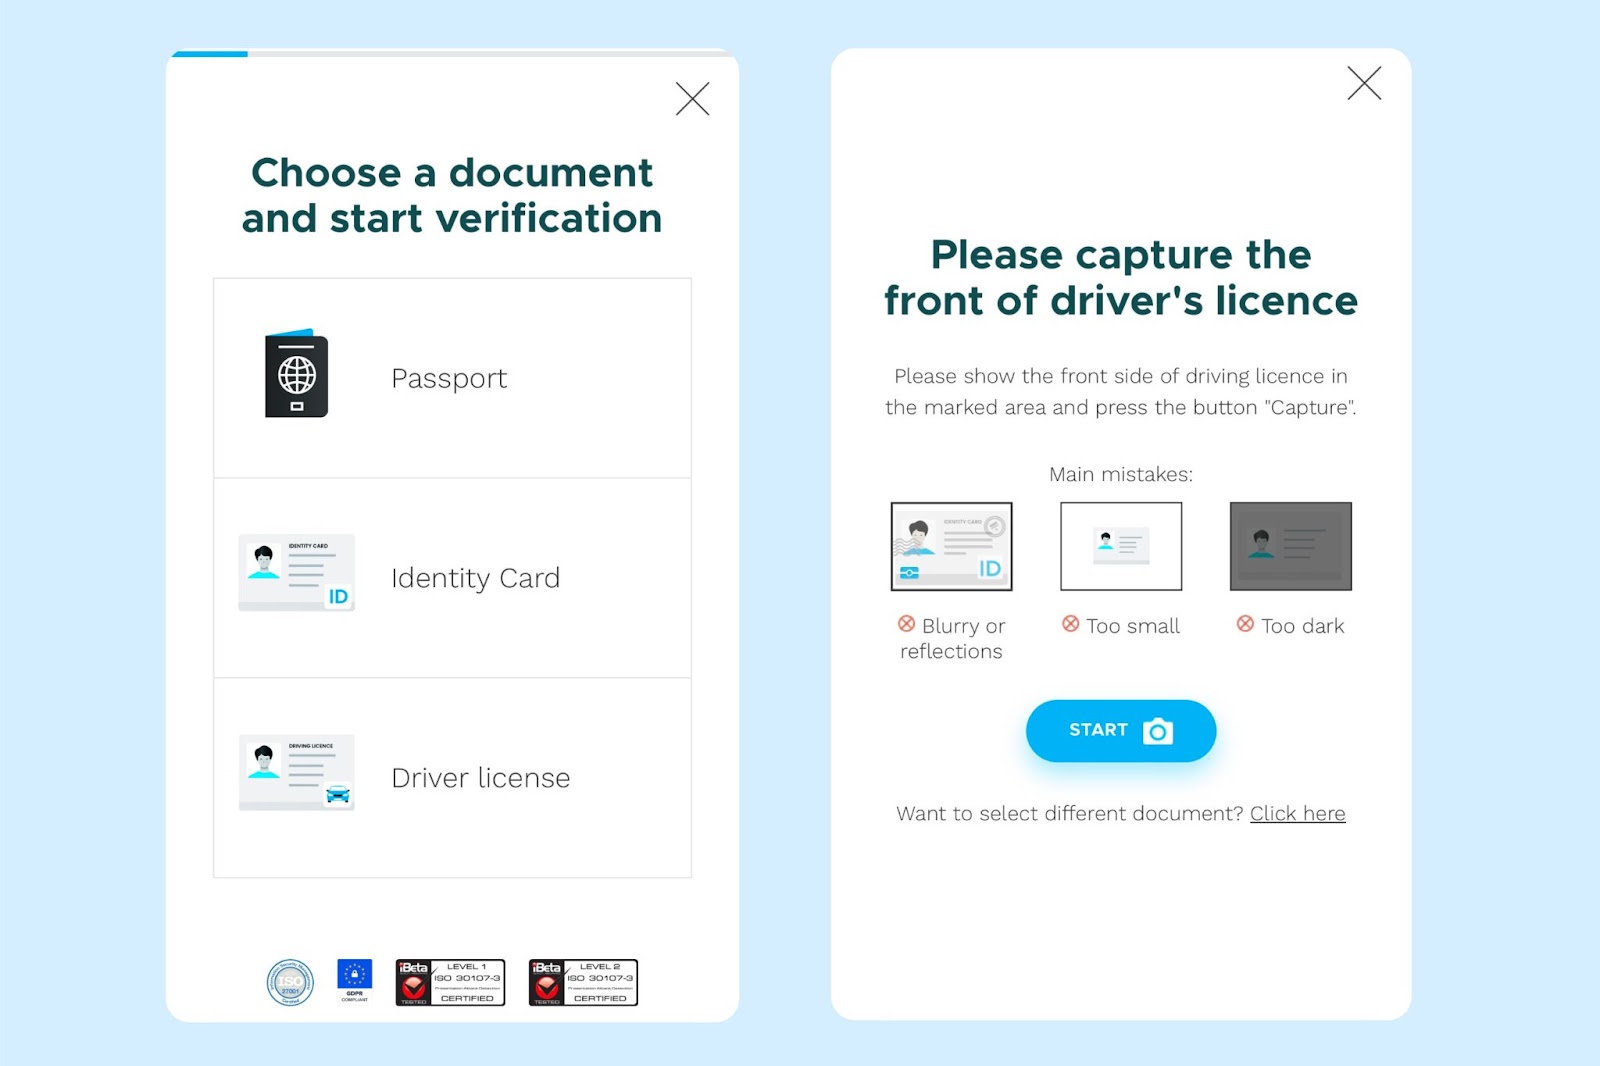
You won’t be able to upload a pre-taken photo—you’ll need to take the picture in real time. It’s also important to follow these guidelines:
- The photo should be clear and easy to read, with no glare; take it in natural daylight without using flash.
- Remove any cover or case from the document.
- Make sure the edges of the document are visible in the frame, and take the photo directly from above.
- Place the document on a neutral background, like a white sheet of paper.
After uploading the document, you’ll need to take a selfie. This usually involves positioning your face inside an on-screen oval. The system may then ask you to move closer to the camera or turn your head slightly.
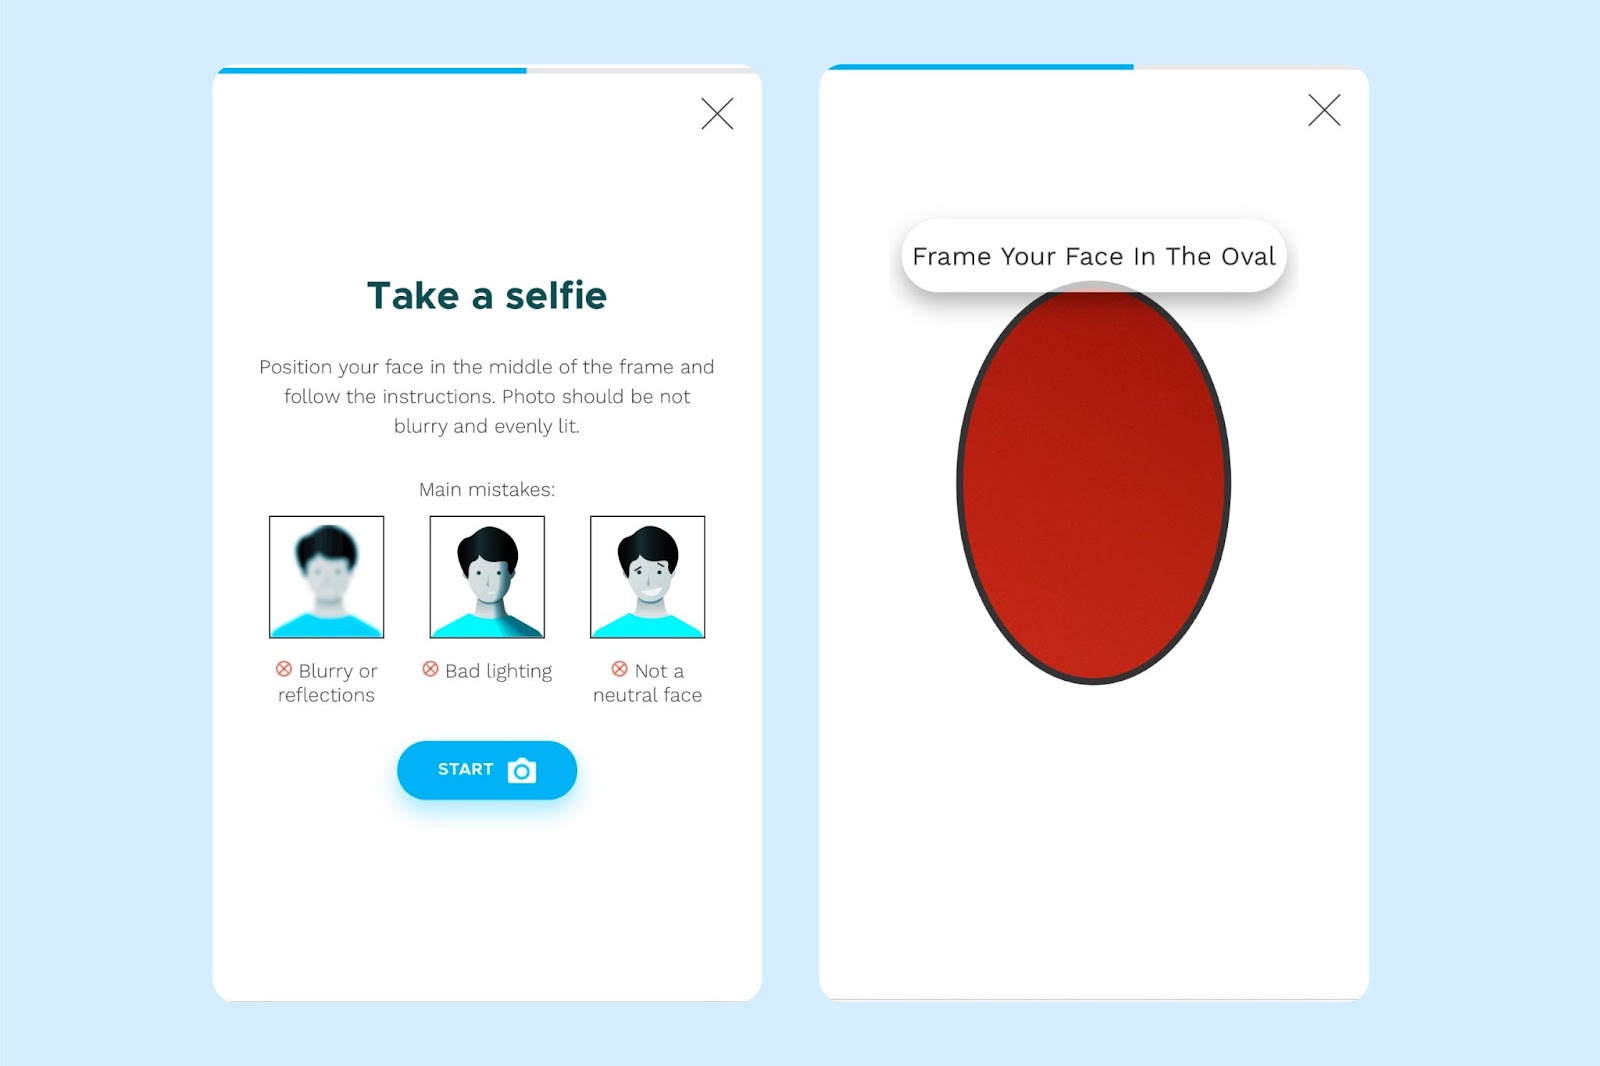
It’s important to make sure your face is clearly visible, so choose a time with good natural light and stand facing a window. Keep your facial expression neutral, without smiling.
Once you complete these steps, your information will go through an automated check, where the system will compare your photos to its requirements. If your selfie or document photos don’t meet the standards, your verification will be rejected right away, but you can simply repeat the process and try again.
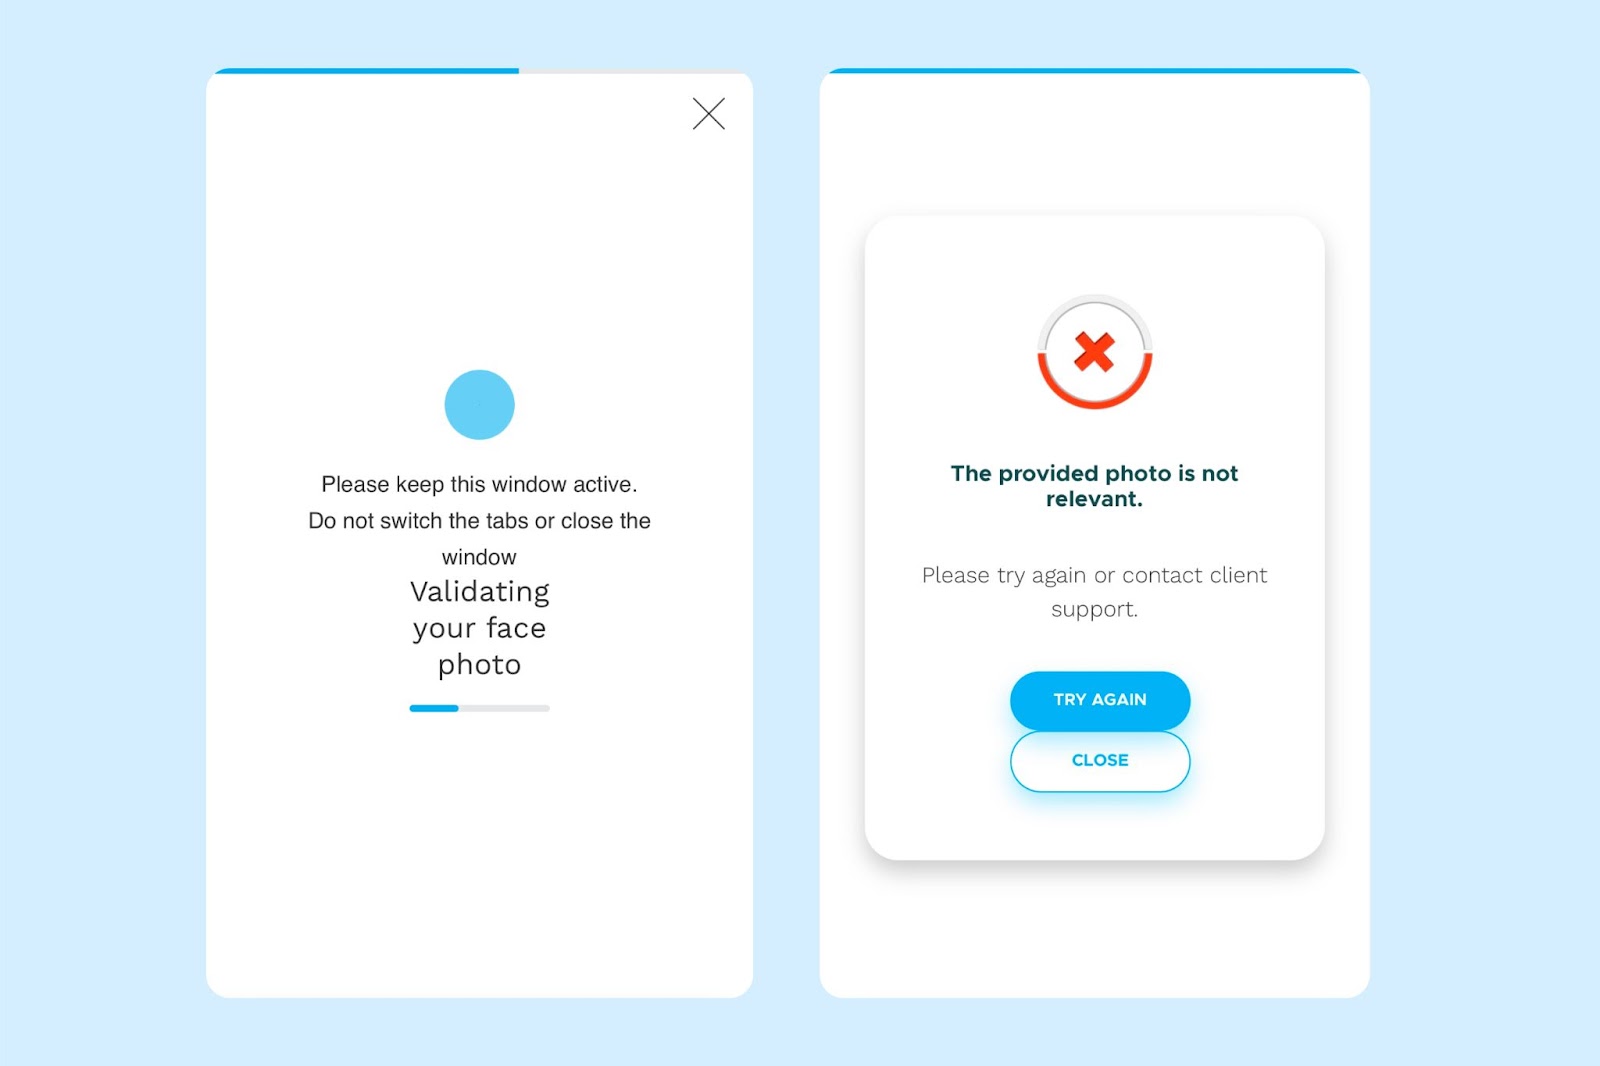
If you pass the automated check, your documents will be sent for manual review. This moderation usually takes anywhere from a few hours to a few days.
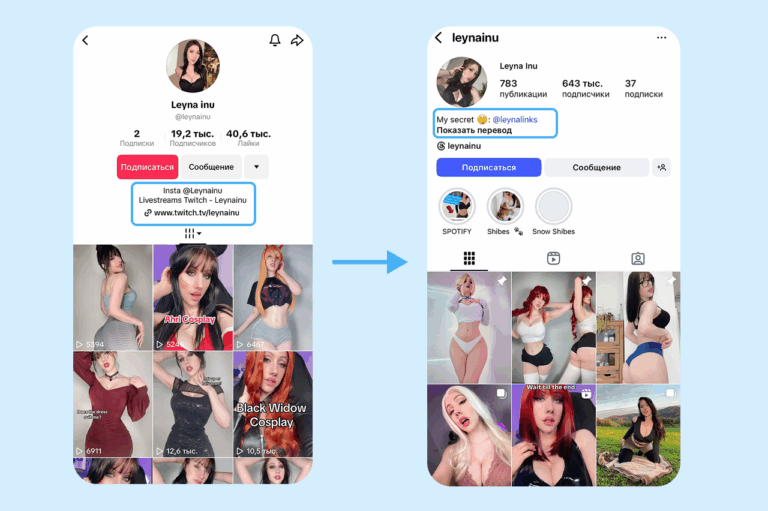
Sometimes, moderators may request additional information to verify your identity. In that case, you’ll need to fill out the “Creator Form,” where you must provide your home address and links to your social media profiles. This information isn’t displayed on your public profile; it’s only used for internal verification. Include a link to a public Instagram or another social network with your photos—moderators are more likely to approve your account if they can see you’re a real person. Write your address in Latin letters, since the system can be picky about formatting, like postal codes or street names. Try different variations without apostrophes or abbreviations, or just include your street and house number.
If your verification is approved, you’ll receive an email notification, and your account will show a “Verified” badge. From that moment, you’ll have access to all creator features.
What to do if your verification is rejected
Sometimes your first verification attempt might be rejected for various reasons, which will be explained in the email from OnlyFans. After that, fix the issue and reapply. If the problem is with your documents, contact the platform’s support team and explain that you live in the selected country and want to work on the platform. Often, support will send a template reply saying that “payments in this country are not possible” and may ask for proof of residence, like a bank statement or a rental agreement. Be ready to provide such documents if you have them, so consider opening a bank account and securing housing in advance.
If you’re following all the steps correctly but still can’t get verified, try registering a new account and going through the verification process again. This way, your application will be reviewed by a different moderator, which could lead to a different decision.
Profile Setup: Profile Picture, Banner, and Bio
Once your account is verified, all creator features will be unlocked. The first thing you should do is polish your profile to make a good impression on OnlyFans users.
Set a high-quality photo of your face as your profile picture, like something natural, engaging, and non-erotic. Avoid using someone else’s images or explicit NSFW pictures for your avatar, as this could violate OnlyFans rules and drive away potential subscribers.

Your profile banner is a horizontal image at the top of your page. You can use it to showcase your content style. Many creators make a collage of several photos or choose a single wide-format image with an appealing composition. The recommended size for your banner is 1800×540 pixels. Check how it looks on mobile devices, and make sure all important elements are centered. It’s best if your banner complements your profile picture and reflects the theme of your content and your niche.
In your bio, briefly introduce yourself and let subscribers know what to expect. Catch their attention in just two or three sentences. Highlight what makes you unique, such as being a fitness trainer, gamer girl, tattoo model, or your passion for roleplay looks. Also mention how often you post new content so subscribers understand how active you are.
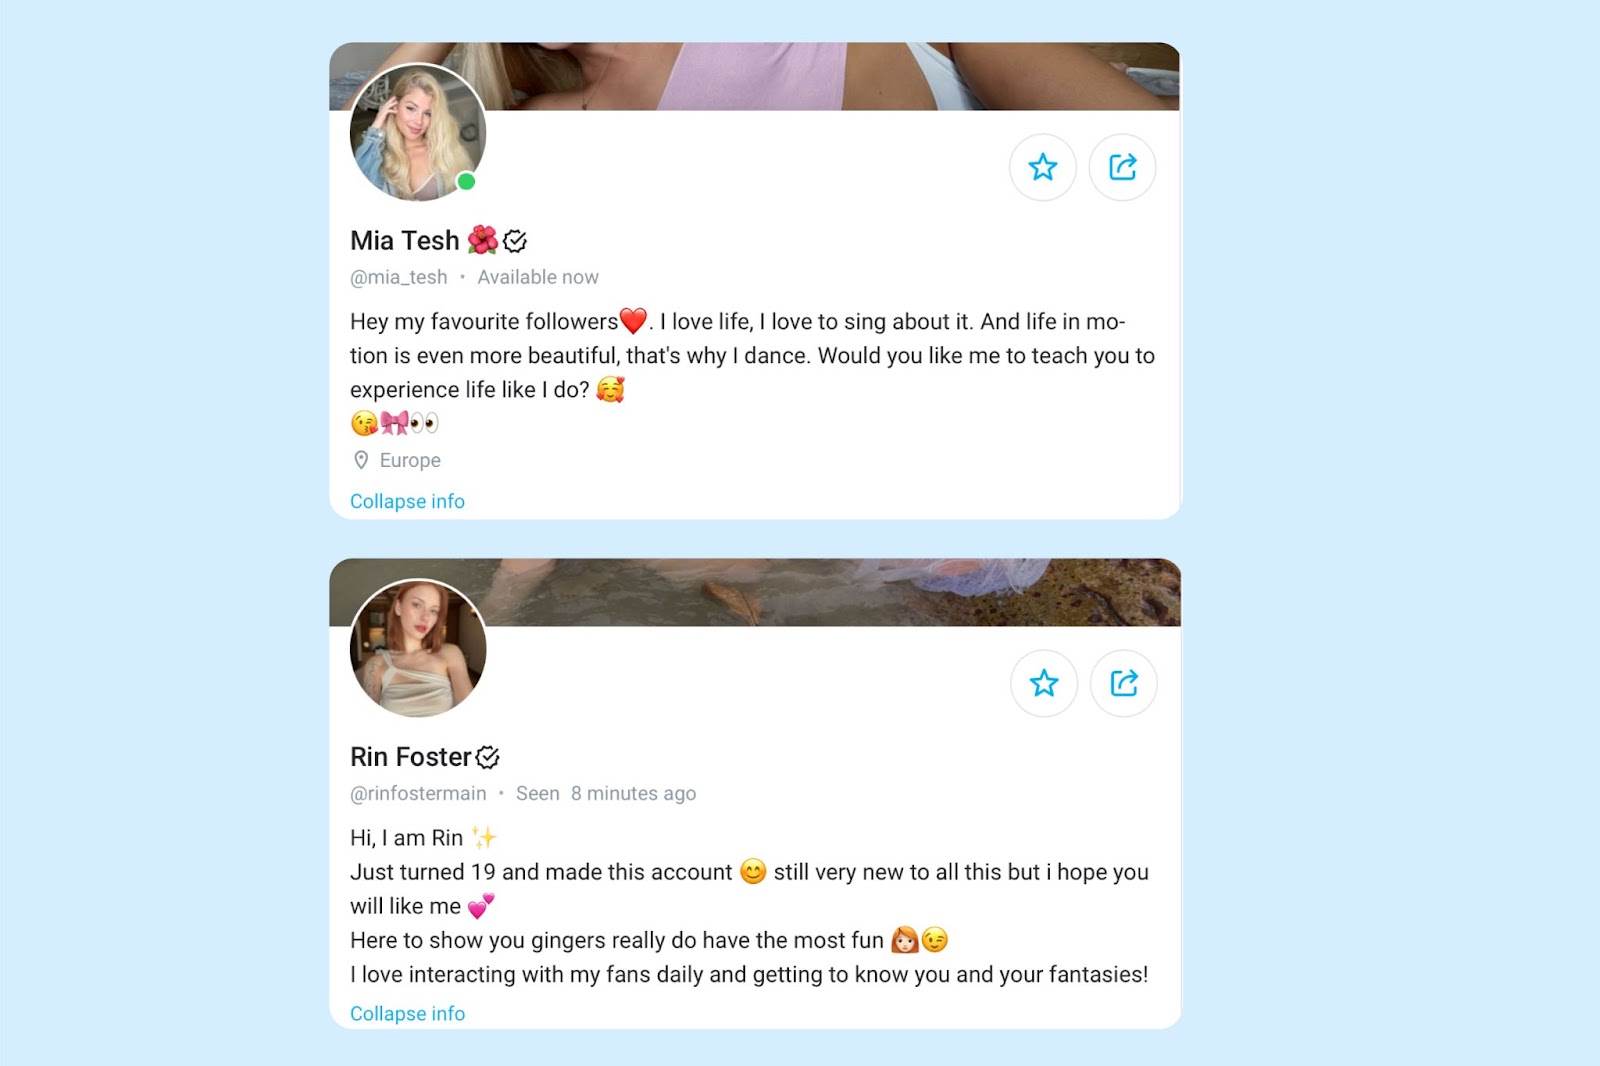
The tone of your bio should be friendly and natural, like you’re introducing yourself on social media. Feel free to add emojis. Try to keep it short and to the point in a single paragraph, since most people won’t read a long text in full.
After verification, you’ll be able to change your display name and username, which is the unique name in your profile URL. Choose carefully, as your username will become your brand. It should be memorable, unique, and reflect your persona. It’s best to use the same username across all platforms, like OnlyFans, Twitter, Instagram, and other social networks, so fans can easily find you through search. For example, if you come up with a stage name, check if it’s available on popular social media. Having the same username everywhere makes it easier for your fans to recognize you. While you can change your profile name later, it’s better to pick a strong option from the start.
Setting Up Payments and Withdrawals
The final step before you start working is to link a payment system for withdrawing your earnings. OnlyFans doesn’t pay directly to bank cards or accounts, so most creators use third-party payment processors or crypto wallets.
In your account, the money you earn first goes into a “Pending Balance” for up to seven days. This is a security measure in case of chargebacks. After a week, the funds move to your main balance, where they become available for withdrawal. You can request a payout manually at any time once you’ve accumulated at least $20, or you can set up automatic withdrawals every week or month on a specific day.
The available withdrawal methods depend on the country listed in your profile. OnlyFans supports direct bank transfers (SWIFT/SEPA) for the US, UK, and EU, but for most other countries, payouts are made through payment processors. The most common options are:
- Paxum is an international electronic payment system that’s popular in the adult industry. Many OnlyFans creators from CIS countries choose Paxum for its reliability. To use it, sign up at paxum.com and complete passport verification. Once verified, you can link your Paxum wallet in your OnlyFans settings. From Paxum, you can withdraw your money to a bank card in US dollars or convert it to cryptocurrency. Paxum still works with some Russian banks. It also lets you order a physical or virtual card you can use to withdraw cash anywhere in the world.
- Skrill is another international e-wallet with integration available in many countries. It works similarly to Paxum: you create an account at skrill.com, verify it, and then connect it to your OnlyFans account. Skrill is well-known among freelancers and gamers and offers reasonable fees. From Skrill, you can transfer funds to a foreign bank account or card. For example, some creators in Ukraine withdraw earnings from OnlyFans to Skrill and then transfer them to their Monobank cards. The same approach works if you have an account in Kazakhstan, Georgia, or other countries.
- CosmoPayment is a payment system popular among creators in Asia and Latin America. You can receive funds and spend them using a prepaid VISA card. Many users praise it for its simplicity: you register online, get a virtual USD card where your payouts land, and you can use it for purchases or cash withdrawals.
- Cryptocurrencies are another option if you want to convert your earnings yourself during withdrawal. For example, Paxum supports payouts in Bitcoin and USDT through its internal exchange. Alternatively, you can transfer funds from your e-wallet to a crypto exchange like Binance, Telegram Wallet, Bybit, or any other platform and buy cryptocurrency there. Many creators from CIS countries use this method to cash out in Russia while bypassing bank transfers. Just be careful and check the fees for these transactions. Cryptocurrency lets you send funds almost anywhere in the world without intermediaries, which is especially valuable under current sanctions.
Choose your withdrawal method based on what’s available to you. For most creators, the optimal setup is OnlyFans → Paxum → cryptocurrency.
Conclusion
It’s possible to register and start working on OnlyFans from Russia and Belarus, although it does require some extra effort. You’ll need a foreign document for verification and a suitable payment system for withdrawing your earnings. But once you complete these steps, you’ll have a fully functional account on the most popular platform for adult content creators. All that’s left is to fill your profile with quality content, set your subscription price, and get started. Wishing you a successful launch!